Archives 2026

Choosing Source Colonies for Queen Rearing

← Back to Educational Resources

Choosing a colony to raise queen cells from is a breeding decision, not simply a question of which hive looks strongest today. The source colony contributes the maternal side of the next generation, so it should be chosen for the direction you want the breeding programme to take.

Start with the breeding objective

Decide what you are trying to maintain or improve. This may include survival, colony health, brood quality, temperament, sensible use of stores and space, or other traits that matter in the colonies and conditions you work with. A source colony should make sense against that objective over time, rather than being selected because of one good inspection or one exceptional honey flow.

Assess a colony as a colony

The performance you see in a hive is not produced by the queen alone. It reflects the interaction of the queen, her workers, the drones that mated with her and the environment in which the colony is being kept. Read the whole colony: its development, brood, behaviour, health and response to local conditions.

A good brood pattern is useful evidence, but it is not a complete verdict. Likewise, a calm inspection, a good crop or rapid spring growth may be valuable observations without proving that the colony is the best breeder. Look for consistency and for a pattern that fits your selection aim.
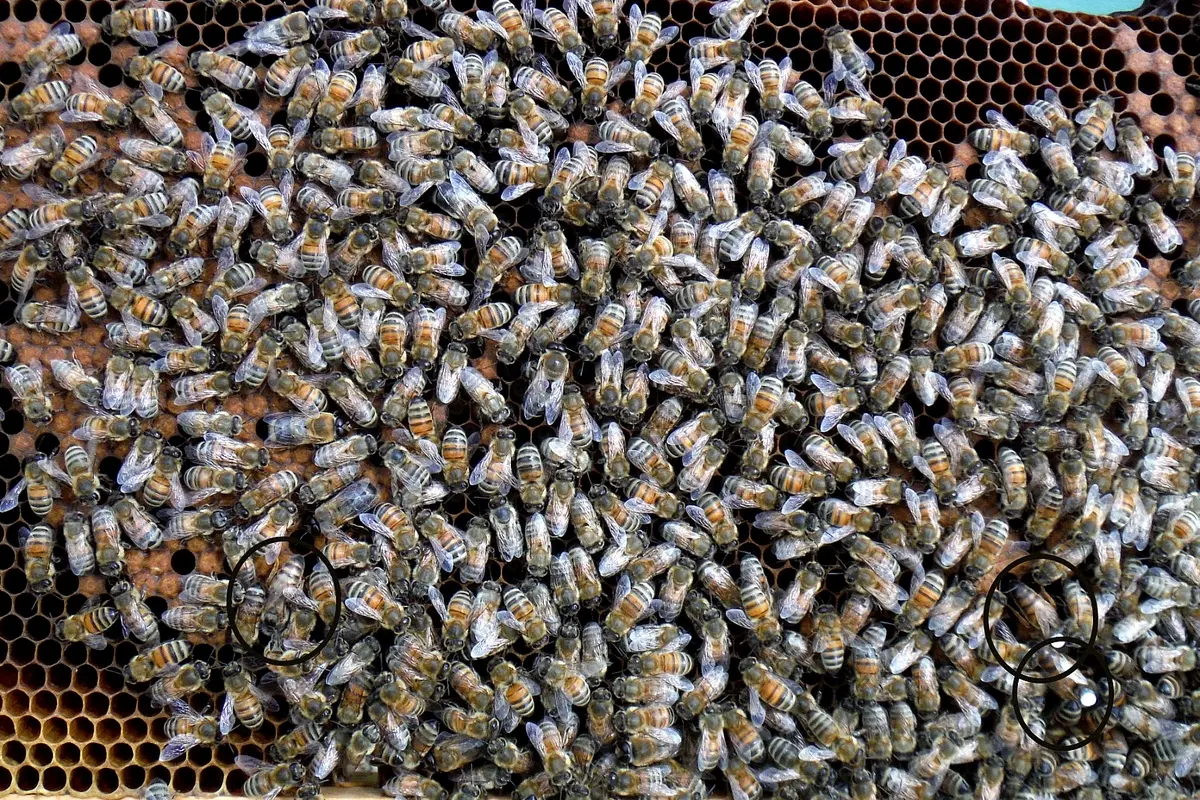
Brood frame with queen bees circled among worker bees
A brood frame is one piece of evidence to consider alongside behaviour, health and performance over time.

Keep source and rearing roles separate

The best colony to provide larvae is not necessarily the best colony to start or finish queen cells. Cell starters and finishers are chosen for their nurse-bee population, resources and ability to care for developing larvae. Breeding source colonies are chosen for the qualities you want to pass on. Keeping those decisions separate helps avoid selecting genetics simply because a colony is convenient for rearing.

Look for concerns as well as strengths

Selection is as much about recognising what should not be carried forward as it is about choosing attractive traits. Investigate persistent health problems, poor brood viability, difficult behaviour, weak recovery or other performance concerns. One unusual observation is a reason to look again; repeated evidence across time is more meaningful.

Remember the paternal side

With open mating, the drone contribution is not fully known. This does not make open-mated daughters useless, but it limits how confidently a breeder can attribute a result to a particular planned pairing. Drone selection and controlled mating can provide more influence or control where that is needed, but neither removes the need to assess the colonies that result.

Use daughters to test the decision

The most useful test of a source colony is what its daughters do. Keep clear, proportionate notes on the source, the mating context and the performance of daughters. Then use those observations to refine the breeding direction. Good selection is an ongoing process of testing, learning and choosing again—not a one-time label placed on a colony.

Next read: Queen Rearing & Breeding resources
Starting and Finishing Queen Cells: What the Colony Needs

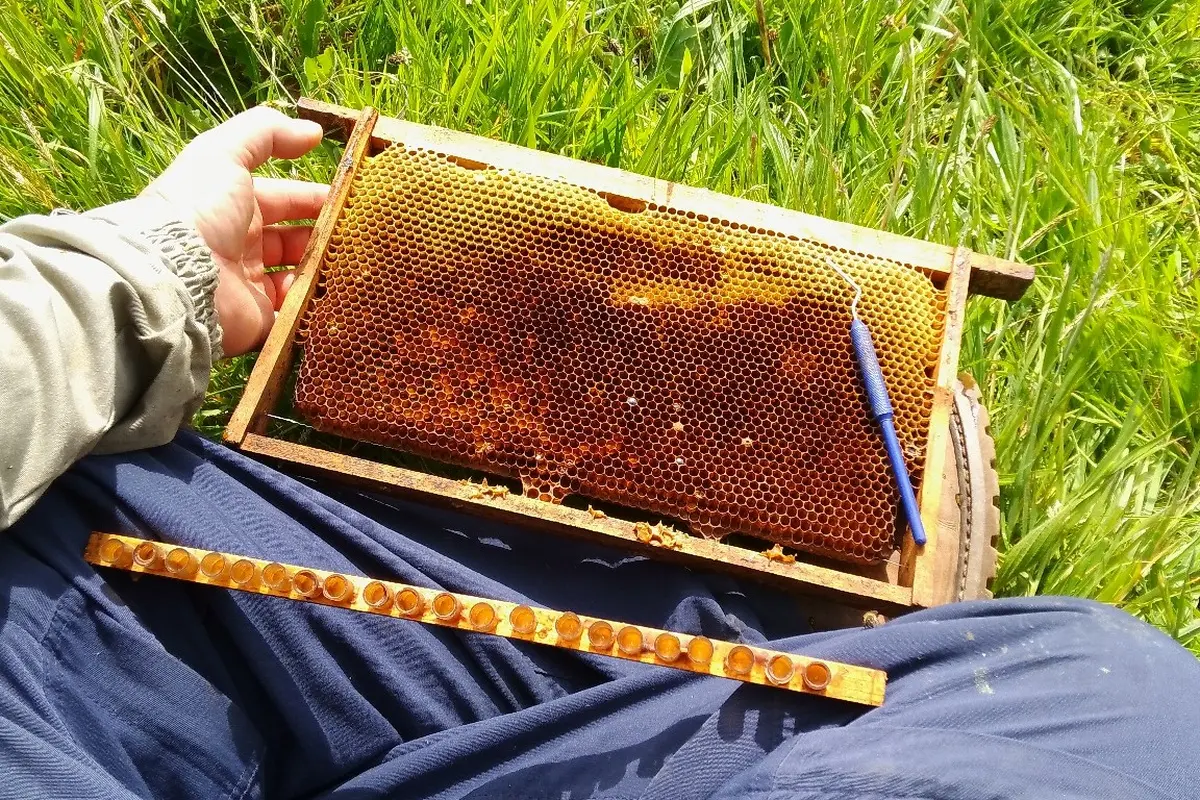
Queen rearing is not only about grafting larvae into cups. The colony must first accept those larvae as queen cells and then continue feeding and caring for them until the cells are mature. A starter and a finisher describe those two jobs. They may be separate colonies or two stages in one carefully managed system.

What a starter does

A starter gives the grafted larvae their first strong response. In the period immediately after grafting, young larvae need abundant attention from nurse bees. A successful starter is prepared so that the bees have a reason and the ability to begin queen cells: it needs a strong population of suitable bees, accessible food and a calm, workable arrangement around the graft frame.

Acceptance is useful information, but it is not the whole result. A high number of cells started does not by itself prove that the colony will finish them well or that every resulting queen will be of the same quality.

What a finisher does

Once cells are established, they still need a colony capable of maintaining the right feeding, temperature and care through the rest of larval development and pupation. A finisher provides this continuity. It needs enough nurse bees and adequate pollen and food stores, and it must remain in a condition where it can support the cells without becoming stressed or disrupted.

A queenright finisher can work well when the cells are kept inaccessible to the resident queen. A queenless system can also be used. The useful choice is the one that gives the developing cells stable, well-supported conditions and that the beekeeper can manage reliably.

Resources matter more than a recipe

There is no single number of frames, bees or grafts that guarantees good queen cells. The important relationship is between the number and age of larvae being asked for, the nurse-bee population, the amount of brood already demanding care, and the available pollen and food. A colony can look very strong and still be the wrong choice if its resources are already stretched.

The conditions experienced by queen larvae matter. Queen cells should therefore be treated as developing animals that need good care from the colony, not as units being processed through a timetable.

Reading the cells and the colony

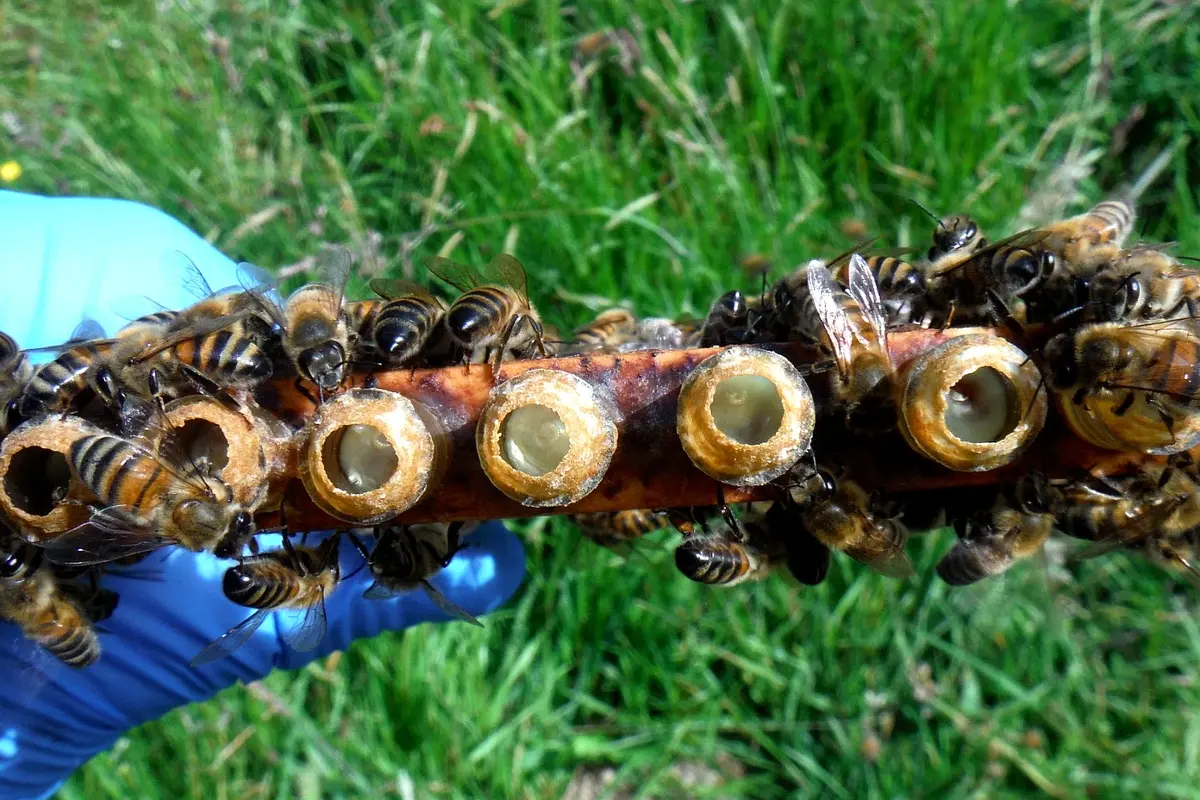
Open queen cells on a frame of honey bee comb
Cell development should be assessed in the context of the colony supporting it.

Look at both the cells and the colony supporting them. Are the cells being drawn and maintained? Is there plenty of young-worker activity around the frame? Does the colony still have accessible pollen and food, and is it behaving as you would expect? If acceptance or cell development is disappointing, use that as a prompt to review colony condition, larval age, grafting technique and the surrounding forage—not as a reason to blame one factor automatically.

A practical approach

Prepare the cell-building colony before grafting, make one clear plan for what it is expected to do, and check that expectation at the next stage. Record exceptions, actions and anything that needs a follow-up. Over time, this will teach you which colonies and arrangements consistently give your larvae the conditions needed to become queens worth keeping.

Next read: Queen Rearing & Breeding resources
How a Queen Bee Develops: From Egg to Emergence

A queen does not develop simply because a larva is put into a queen cell. She develops because the colony gives a very young female larva the cell, food, care and conditions needed for queen development. The broad timetable is useful for planning, but it is a working window—not a promise of exactly what will happen on a particular day.

From egg to queen larva

Like a worker, a queen begins as a fertilised egg. It remains an egg for about three days before hatching. The difference between worker and queen development is established through the way the larva is reared: the queen cell, larval feeding and the care provided by the worker bees all matter.

When grafting, the age of the larva matters. Use very young larvae so the colony can continue queen development from an early stage. A larva that is already too old will not give the colony the same opportunity to raise a well-developed queen.

A practical development window

Open queen cells on a frame of honey bee comb
Queen cells are part of the colony’s development process; their condition and timing both matter.
StageUseful planning guide
Egg laid to hatchingAbout three days.
GraftingUse a very young larva, commonly around the point at which it has only recently hatched.
Graft to cell sealingAllow roughly five days as a guide.
Sealed cell to emergenceAllow roughly a week, while treating emergence as a window rather than one fixed date.
Egg to emergenceUsually planned around sixteen days, with a margin either side.

These figures are planning aids. Development temperature can shift the timetable: incubator work has shown that changes in temperature alter the emergence window. The genetic background of the queen and the quality of care from the colony also matter. When several cells are due, allow for queens to emerge over roughly a day rather than assuming they will all emerge at one exact time.

Emergence is not the end of development

An emerged virgin queen is not immediately ready to mate. She needs time to mature, orientate and, if conditions allow, take mating flights. A useful practical guide is that sexual maturity may be reached after several days, but the point at which she mates and begins laying depends on weather, drone availability, genetics and the way she is cared for.

In good conditions a queen may be mated and laying within a relatively short period after emergence. Prolonged poor weather can delay the process considerably. Plan checks as ranges: look for evidence of laying around two weeks after emergence, and assess what you find in the context of the weather and whether you can see the queen.

Use the timetable to ask better questions

The purpose of a queen-development timetable is not to force colonies into a calendar. It helps you decide when a cell should be handled carefully, when an emergence is plausible, and when a virgin queen or mating nucleus needs attention. Record the stage, anything unexpected and what you expect to see next; then let the colony and the conditions tell you whether that expectation was sound.

Next read: Queen Rearing & Breeding resources
Instrumental Insemination Equipment and Setup – An Overview

← Back to Educational Resources

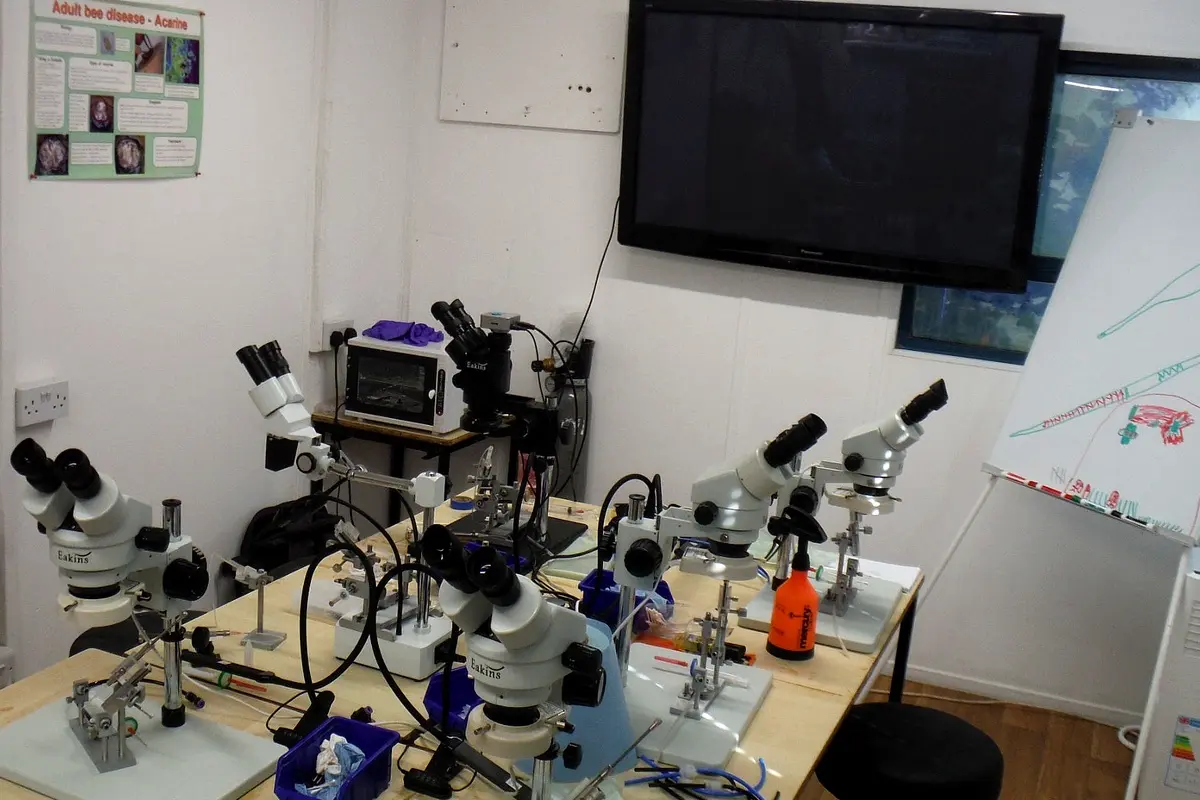
Instrumental insemination needs a purpose-built setup, but it is better understood as a working system than as a list of things to buy. Each part needs to support careful handling, clean technique and the welfare of the queens and drones involved. The right setup is one that is stable, practical to clean and suited to the breeder’s intended work.

The microscope

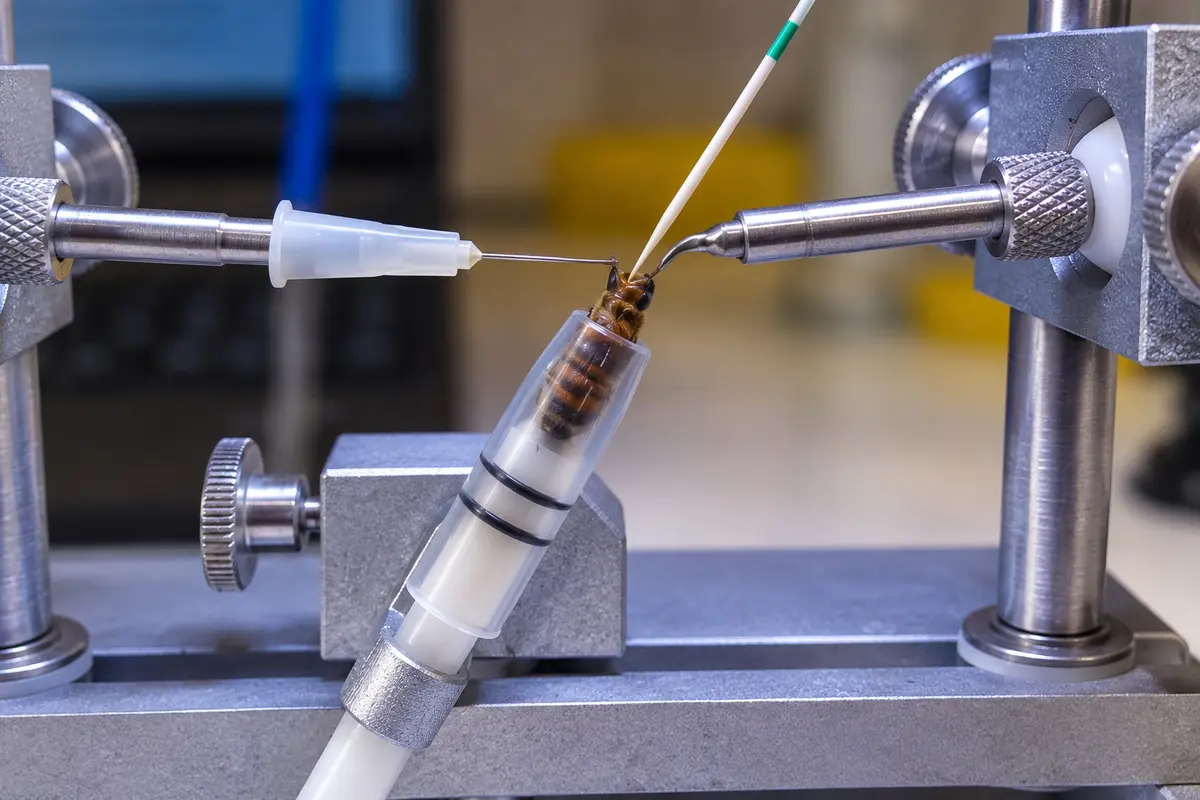
Close view of instrumental insemination equipment in use
The microscope and insemination unit support precise, controlled work.

A binocular stereo microscope gives the depth perception needed to work accurately at close range. A generous working distance is important, so that there is room to position the queen and the insemination unit beneath the optics. Variable magnification is useful because it allows the view to be adapted to the stage of the procedure.

A camera or screen can be valuable for teaching and demonstration, but it is not a replacement for the depth perception of a suitable binocular microscope when carrying out the work itself.

The insemination unit

The insemination unit holds and positions the queen and the instruments used to collect and deliver semen. There are several designs and configurations. When choosing one, practical considerations matter more than novelty: it should be stable, straightforward to clean, and use parts and consumables that can be replaced or standardised.

A unit that can be maintained properly and understood by the person using it is more useful than a complicated setup with features that do not support the breeding aim.

Gas control and handling equipment

A controlled carbon-dioxide system forms part of a normal instrumental insemination setup. It needs to be capable of gentle, controlled delivery and used as part of a properly learned procedure. Queen cages, drone cages and other handling equipment are equally important because much of the work is in preparing, holding and caring for the bees before and after the time at the microscope.

Consumables and cleanliness

Routine consumables include insemination tips, syringes, syringe fittings, saline, cotton buds and suitable cleaning materials. These are not minor details. Equipment must be cleaned before and after use so that debris does not build up and so that cleaning leaves no harmful residue on the parts that will contact bees or semen.

Keeping the workspace orderly and the equipment clean makes the procedure more repeatable and makes it easier to identify what needs attention when something does not go as expected.

Supporting the whole system

Depending on the scale and timing of the work, the wider setup may include a drone collection station, queen-holding cages, an incubator and larger cages for temporary care. These items are not automatically necessary for every breeder, but they can make it easier to plan queens, drones and aftercare as a coherent system.

Choose equipment to support competence

Buying specialist equipment is not the same as being ready to use it. Instrumental insemination depends on good bee handling, careful preparation and repeated practical experience. Start with a clear objective, a sound understanding of the process and a setup that can be kept clean and consistent. Add equipment when it solves a genuine practical need.

For most people, hands-on training is the best way to understand how the parts work together before investing in a complete setup. Learn about Bishops Bees’ Instrumental Insemination Course.

Next read: Instrumental Insemination resources

When Instrumental Insemination Is Useful

← Back to Educational Resources

Instrumental insemination is most useful when a breeder has a specific question that open mating cannot answer reliably. It gives precise control of a queen’s paternal source, but that control only has value when it supports a clear breeding aim and is followed by proper assessment of the resulting colonies.

Testing a planned pairing

A breeder may want to see what results from one known queen line paired with drones from a particular source. Instrumental insemination makes that pairing possible and repeatable. This is useful when comparing families, investigating a trait or deciding whether two lines complement each other.

The result is still one piece of evidence. Colonies need to be assessed in their own right, and promising results need to be repeated before they are treated as a dependable direction for a breeding programme.

Maintaining known parentage

When a breeder is developing or maintaining a line, knowing both sides of the mating can be important. Instrumental insemination can keep selected maternal and paternal lines connected while their daughters are evaluated. It can also make it easier to understand where a useful or unwanted characteristic may have come from.

That does not mean narrowing the breeding population without thought. Healthy, workable colonies and broad enough genetic diversity remain essential. Controlled mating should support sensible selection, not replace it.

When open mating may be enough

Open mating is often entirely appropriate. If the local drone population is suitable for the breeding aim, an open-mated queen can produce a useful colony and give valuable information about a queen line. A beekeeper can also influence open mating by raising drones from selected colonies, but this is influence rather than control: a queen still meets drones from the wider area.

There is little value in using instrumental insemination simply because it is available. If there is no clear question, no suitable source colonies, or no plan to evaluate the daughters, the additional work may not improve the breeding decision.

Situations where it adds most value

  • Testing a particular maternal and paternal combination.
  • Making breeder queens with known parentage.
  • Keeping a selected line available while it is assessed.
  • Comparing the outcomes of different planned crosses.
  • Working where open mating cannot give the required level of genetic control.

Start with the breeding objective

The first question is not “Can this queen be instrumentally inseminated?” but “What am I trying to learn or improve?” Define the traits and the source colonies, plan how the resulting queens and daughters will be assessed, then decide whether controlled mating is the right tool.

Instrumental insemination becomes worthwhile when it makes a breeding decision clearer. It is not a substitute for good colonies, careful observation or patient selection over more than one generation.

Next read: Instrumental Insemination resources

Reproductive Biology and Timing for Instrumental Insemination

Instrumental insemination works best when it follows the biology of the queen and drones rather than a fixed calendar. The equipment gives control over parentage, but it does not remove the normal biological requirements for well-developed queens, fertile drones and calm, well-provisioned colonies.

Timing is a working range, not a deadline

It is useful to plan the work from queen emergence, but no single day guarantees that a queen or drone is ready. Development temperature, genetics, nutrition, colony conditions and handling all influence the pace of maturation. Use dates to give bees enough time and to organise the work; do not treat them as proof of an individual bee’s condition.

The queen

A virgin queen continues to mature after emergence. Her reproductive system develops and her behaviour changes as she becomes capable of mating or insemination. There is no simple practical assessment that tells the beekeeper that an individual virgin queen has reached the right level of reproductive maturity. Age is therefore used as a safeguard: the aim is to allow ample time before insemination, rather than to diagnose maturity in the queen herself.

Some instrumental-insemination programmes work from about six days after emergence, based on the expectation that queens have had time to mature by then. Seven days is a cautious and useful practical point: keeping a queen a little longer gives more margin, whereas attempting insemination too early risks a poorer outcome. This is still a working range, not a guarantee; individual queens and batches will vary.

For practical queen rearing, the important preparation begins well before the insemination day: rear queens in strong, well-fed colonies; avoid unnecessary chilling or disturbance; and keep clear records of emergence, parentage and handling. A queen that is undersized, damaged or simply not developing normally is not improved by keeping to a timetable.

The drones

Drones also need time after emergence before they are useful as semen donors. In breeding work, “about 40 days from egg” is a practical midpoint for planning a supply of mature drones. It is not a biological switch: some drones may mature before or after that point, depending on their development and colony conditions. The value of the midpoint is that, when the colony has been prepared properly, there should be a sufficient number of mature drones available.

The drone calculation has a different purpose from the queen calculation. Mature drones need opportunities to fly, and as they age they are increasingly exposed to the normal risks of life outside the colony. Plan for a point at which there are ample mature drones, but do not wait so long that a large proportion of the original cohort has been lost. Build the drone plan backwards from the intended insemination period and allow a margin for weather, uneven emergence and normal colony variation.

Why mating biology still matters

Natural mating is followed by major changes in a queen’s behaviour and physiology, including reduced mating-flight behaviour and activation of reproduction. Instrumental insemination is designed to achieve fertilisation while controlling parentage, but it does not make the queen a simple container for semen. Insemination volume, semen and seminal fluid, carbon-dioxide anaesthesia and handling can all influence the queen’s subsequent reproductive response.

That is why a sound technique is more than a mechanical procedure. The queen needs appropriate recovery conditions afterwards, and her introduction and early laying should be assessed as part of the whole process.

Plan with buffers

  • Prepare drones early enough that a good supply of mature individuals is expected.
  • Use emergence dates to organise queens, while giving them a cautious margin for maturation.
  • Keep suitable nucleus colonies ready for queens before insemination takes place.
  • Expect a period of recovery and establishment before judging a queen.
  • Record departures from expectation and use them to improve the next batch.

Assess the result in the colony

Do not judge success on the day of insemination. The useful outcome is a queen that establishes, lays consistently and heads a viable colony. As with naturally mated queens, give the colony time to settle and look for a developing laying pattern over successive inspections. One early observation is information, not a final verdict.

Instrumental insemination gives breeders powerful control over the mating decision. The best results still come from working with living bees: good rearing, mature drones, careful timing, suitable colonies and patient assessment afterwards.

Related research

These links are background sources for readers who want to follow the evidence behind the topic. Putative Drone Copulation Factors Regulating Honey Bee Queen Reproduction and Health is a review article; The effects of mating and instrumental insemination on queen honey bee flight behaviour and gene expression reports original research; and The Potential of Instrumental Insemination for Sustainable Honeybee Breeding is a review of instrumental insemination in breeding.

Instrumental Insemination: What Is It For?

← Back to Educational Resources

Instrumental insemination is a way of controlling the mating of a honey bee queen. Semen is collected from selected drones and introduced to a virgin queen using specialised equipment. In honey bee breeding it is usually called instrumental insemination because the process depends on careful handling and purpose-built instruments.

It is a breeding tool, not a way to make any queen better by the procedure alone. Its value lies in making the parentage of a queen known, so that a breeding plan can be tested and developed with more confidence.

Why control mating?

With open mating, a queen mates in the air with drones from the local population. That can produce good, useful queens, but the paternal side is largely unknown. Instrumental insemination allows the breeder to choose both the queen line and the drone source.

This makes it possible to create planned crosses, keep particular lines separate while they are assessed, and compare the outcomes of different pairings. It is particularly useful when the aim is to understand inheritance, maintain a breeding population or produce breeder queens with known parentage.

What it can—and cannot—tell you

Known parentage is useful evidence, but it is not a verdict on the quality of the resulting colony. Traits such as temperament, brood viability, health and productivity still need to be assessed in colonies over time and in the conditions where they will be kept. A carefully planned mating does not remove the need to select from the colonies that result.

Nor does instrumental insemination replace open mating in ordinary beekeeping. Open-mated queens can be entirely suitable where the local drone population is appropriate for the breeding aim. The two approaches serve different purposes; the useful choice depends on what the beekeeper is trying to learn or achieve.

What the process involves

Successful instrumental insemination begins well before the insemination itself. It requires suitable virgin queens, a planned supply of mature drones, semen collection, controlled handling of queens and good care afterwards. The equipment and technique are specialised, and small details of hygiene, timing and queen care can affect the result.

For that reason, it is best approached as a complete system rather than a single procedure at a microscope. The genetics, the preparation of queens and drones, the insemination technique and the subsequent assessment of colonies all need to support the same breeding objective.

Using it with a clear breeding aim

Before choosing instrumental insemination, define what you want to improve or investigate. A sensible aim might be to test a particular pairing, preserve a line while it is evaluated, or make breeder queens with a known paternal source. Broad, healthy selection remains important: no mating method compensates for choosing poor source colonies or for overlooking the performance of their daughters.

Instrumental insemination is therefore most valuable when it is used alongside careful colony assessment and records that answer a practical question. Keep the focus on what the resulting colonies show, rather than assuming that the mating method itself guarantees an outcome.

Next read: Instrumental Insemination resources

Queens, Workers and Drones: How the Colony Works

A honey bee colony is made up of queens, workers and drones. These are not independent job titles: a colony works through the many interactions between its bees, its brood, its food stores and the conditions around it. Understanding the different roles helps you read a colony, but no single bee—or single sign—explains the whole picture.

The queen: reproduction, not command

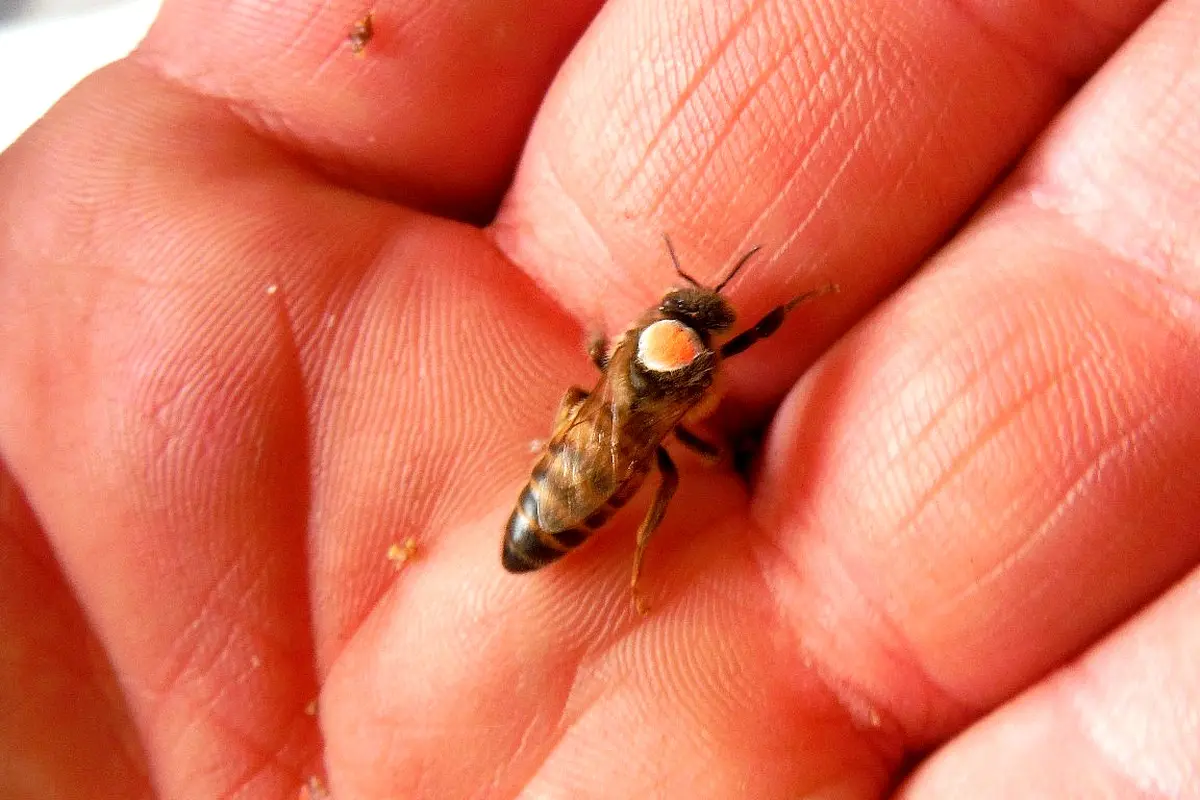
Marked queen bee among worker bees on comb
A marked queen is easier to spot among workers during an inspection.

The queen is normally the colony’s main reproductive female. She lays fertilised eggs, which develop into female bees, and unfertilised eggs, which develop into drones. Whether a female larva becomes a worker or a queen depends on how it is reared.

The queen’s pheromones are part of the chemical signalling that helps maintain colony cohesion and reproductive organisation. That does not make her a leader directing individual workers. Colony activity emerges from interactions between bees and from feedback about brood, food, space, weather and other conditions.

Workers: a flexible female workforce

Workers are female bees and carry out the activities that allow the colony to function: cleaning and maintaining the nest, rearing brood, building wax comb, receiving and storing food, ventilating, guarding and foraging.

The type of work a worker is most likely to do often changes with age and physiological state, but it is not a rigid timetable. Workers can respond to what the colony needs. A colony short of foragers, for example, can bring workers into foraging earlier; a colony with a great deal of brood has a different demand on its workers from one preparing to overwinter.

Drones: male bees and mating

Drones are male bees. Their primary biological role is to mate with virgin queens, helping to move genes between colonies. They do not forage for the colony or take part in brood rearing, but they are an important part of the colony’s reproduction and of the wider bee population.

The number of drones and their seasonal presence vary with colony condition, forage and the time of year. Seeing drones is therefore something to place in context, rather than a reason to draw a conclusion on its own.

Roles work together

The queen’s laying establishes the next generation; workers provide the food, warmth, care and nest conditions that allow brood to develop; drones contribute to reproduction beyond the colony. These roles only make sense as parts of a living system. Seeing the queen, seeing drones, or counting a few workers at a task is not, by itself, a verdict on how a colony is doing.

What to look for at an inspection

Rather than trying to count every bee or record every task, ask whether the pattern in front of you makes sense for that colony at that time. Are eggs and brood present where you would expect them? Does the worker population look sufficient for the amount of brood and the season? Are drones present in a way that fits the time of year and the colony’s condition?

Use those observations to predict what you expect to find next time, then test that prediction. A brief note is most useful when something is unexpected, needs action or needs a follow-up—not when a normal colony has simply continued normally.

Next read: Honey Bee Life Cycles: From Egg to Adult Bee

How a Honey Bee Colony Changes Through the Season

A honey bee colony does not follow a fixed calendar. Its population, brood nest, stores and behaviour respond to temperature, weather, forage and the condition of the colony itself. Seasonal patterns are useful context, but the colony in front of you is the evidence that matters.

Winter: survival and conservation

During colder periods, a colony forms a cluster around the brood and stores, using its food reserves to generate heat and survive. Brood rearing may reduce greatly or pause, depending on local conditions. A colony can still be active on mild days, so a quiet entrance is not automatically a problem. The important questions are whether it has accessible stores, is dry and has come through the period in a condition that makes sense for the site and weather.

Spring: growth can outpace appearances

As temperatures and forage improve, queens often increase laying and the brood nest expands. The number of bees does not rise immediately: new workers need time to develop and emerge. This creates a period when a colony may be rearing a large amount of brood while its adult population and stores are under pressure. A promising spring colony still needs observation; cold weather, a break in forage or limited stores can slow or reverse progress.

Early-season pressure and reproduction

As more brood emerges, the adult workforce can grow quickly. Space, stores, weather, queen condition and the colony’s reproductive state all interact. Swarming is the colony’s natural reproductive process, not simply the result of one sign or one date. Queen cells are important evidence, but they are part of a wider picture that includes brood-nest development, open laying space, population and the current conditions.

Summer: gathering, rearing and change

In good forage conditions, colonies may collect nectar and pollen while continuing to rear brood. The balance can change rapidly with a dry spell, heavy rain, a nectar flow ending or a change in available plants. A colony that appeared to have ample stores one week may need a different assessment later. Look at the relationship between the bees, brood, accessible food and available space rather than assuming that summer always means abundance.

Late summer and autumn: preparing for the next season

As conditions change, many colonies reduce brood rearing and begin forming the population that will carry them through winter. Forage may still be available, but it can become more intermittent. This is a useful time to notice whether the colony has a suitable balance of bees, brood and stores, and whether any health or queen issue needs attention before the harder months arrive.

Use patterns, not deadlines

In North Devon and elsewhere in the UK, the timing of these changes can vary greatly between sites and years. Weather, altitude, exposure and local forage all matter. Rather than asking whether a colony is exactly “on schedule”, make a prediction from what you see: what would you expect to change by the next visit? Then test that prediction. Over time, this builds a much stronger understanding of the colonies in your own apiary.

Next read: Queens, Workers and Drones: How the Colony Works

Beehives in an apiary setting
Preparing Your Apiary Site & Hive

Before a colony arrives, prepare a place where you can look after it consistently and without unnecessary disturbance. There is no perfect apiary site for every situation. The useful site is one that works safely for you, the colony and the people around it.

Choose a place you can use well

Think first about access. You need to be able to reach the hive in ordinary weather, carry equipment safely and work around it without rushing. A site that looks ideal but is awkward to visit can make routine care harder. Allow enough room to put down a roof and work calmly during an inspection.

Consider flight paths and neighbours

Watch where bees are likely to leave and return to the hive. Avoid placing the entrance directly across a regularly used path, doorway, seating area or boundary where people stand close by. Hedges, fences and planting can help lift the flight line, but each garden and apiary is different. The aim is to reduce avoidable conflict, not to follow a single rule about direction.

Weather, shelter and surroundings

Colonies benefit from a dry, stable position with reasonable shelter from persistent wind. Sun can be useful, particularly in cooler periods, but it is only one part of the picture. Observe how the site behaves through the day: where water sits after rain, where wind funnels, whether vegetation blocks your approach and how hot the hive becomes in still summer weather.

Set the hive up securely

Use a firm, level stand that keeps the hive off wet ground and lets you work at a comfortable height. Assemble the hive before the colony arrives, checking that the floor, brood box, roof and frames are compatible with the nuc you are collecting. Make sure the roof is secure and that the hive will not rock or shift when you lift a box or inspect frames.

Have an arrival plan

Know where the nuc will be placed and how you will move its frames into the prepared hive, if that is the plan. Have the smoker, hive tool and protective clothing ready before you begin. On arrival, keep the work simple and calm. A newly moved colony needs time to orientate and settle; avoid turning the first day into an extended inspection unless there is a clear reason.

A short readiness check

  • The hive is assembled, stable and weatherproof.
  • The frames and box format match the colony you are receiving.
  • You can approach and work around the hive safely.
  • The flight path is unlikely to cause an avoidable problem for people nearby.
  • You have your protective clothing, smoker, hive tool and a simple plan ready.

Good preparation does not guarantee every outcome, but it gives the colony a secure start and gives you the conditions to observe and respond well.

Next read: First Inspections: What to Look For